edit with me
Hello! Hope you are having a great week (:
Can you believe it is May already? Almost half of 2021 has passed :O
It is insane how much time flies and since things are opening back up here in Los Angeles, I feel like everything is moving so quickly now. Rumor has it —everything will go back to normal in June!!
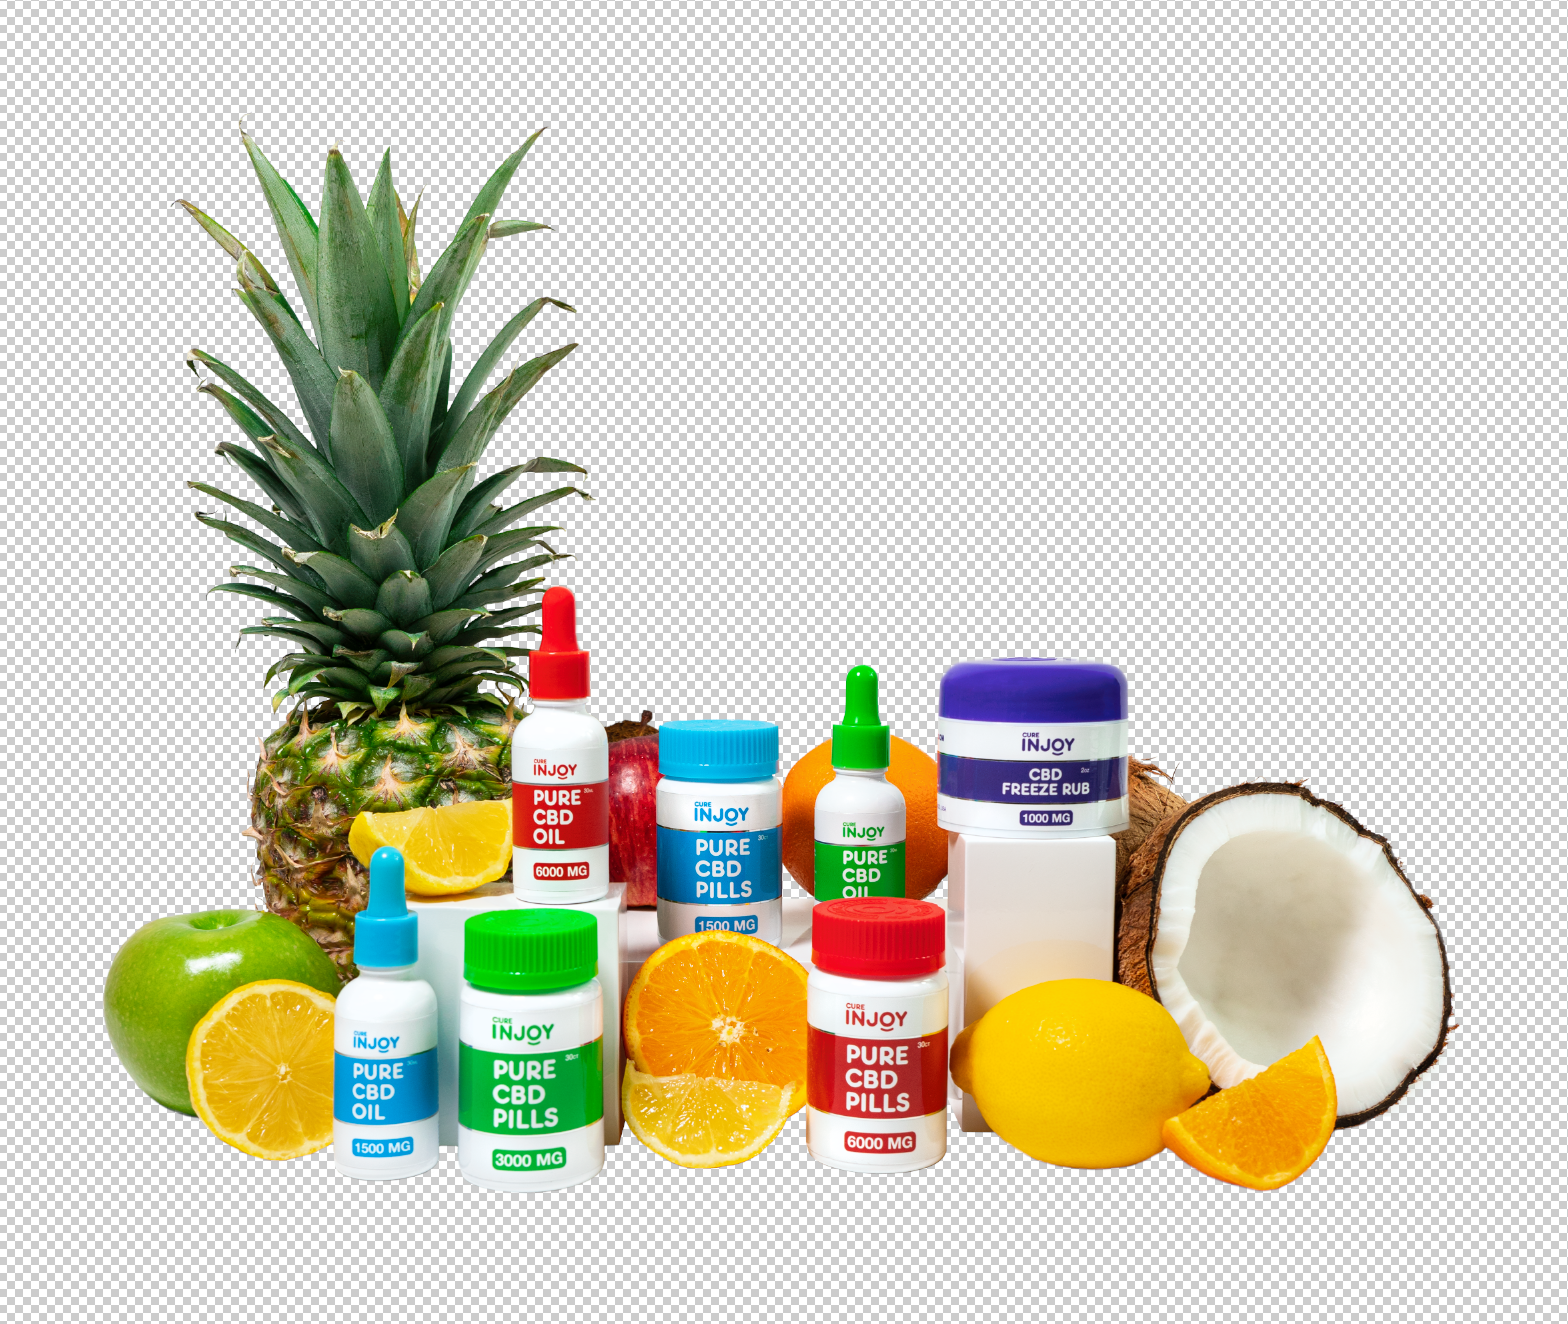
In all seriousness, I am here to share how I edit a photo from a shoot I did for Cure Injoy, a CBD brand. For this shoot, the focus was on the packaging and product so very few props would be incorporated. To keep things simples, the backgrounds were colors of the product (red, purple, blue, or green) —poster paper and seamless rolls were used. A white background was used for the group shot because I wanted to edit the background into a different color. To make the shot more interesting, I incorporated various fruits and used blocks to create levels.

Majority of the time, I have a one light setup using the Godox SL60W and bounce boards. The Godox light has an adjustable power dial and is considered one of the more affordable options. It comes in various variants with higher power output. This time, I also used a softbox because the client wanted minimal shadows that aren’t as harsh. Two 2 ft x 4 ft fiberboards that were painted white were used as the background. The table is a foldable table from — HIGHLY DON’T RECOMMEND — because the surface of the table isn’t completely straight. Something I noticed during post-production when I’d try to straighten objects.

To straighten the objects as much as possible, I drag the ruler to the edge of objects that should be straight. First, I’ll use the transform tool to get the image as straight as possible horizontally. After this step, a lot of times some objects will not be aligned to the rulers because not all objects are straight or the photo wasn’t taken eye level/ from the center. To make the objects as aligned as possible, I would try the following:
select the object > paste to a new layer
transform > rotate OR skew OR warp

Lately, I’ve been doing a lot of warping since it gives you more freedom to adjust the photo. Once everything is aligned, I move on to retouching with the clone, heal, and patch tools to fix imperfections such as reflections/ glares, dirty spots, distorted objects from warping, etc. Next, dodge/ burn to make the objects pop. Then color correction using the selective color adjustment for each color in the image. Also, I always zoom in to view the image at 200% - 400% so nothing is missed.
Once the retouching is done, I will mask out the products/ objects so the background can be edited. For this group shot, I added an ombre blue pastel that is subtle but also makes the image pop. Then I use this technique I learned from Bonne Bonne Creative to make the final image sharper.
create new layer (bring to top)
image > apply image
filter > other > high pass > radius between 1-2 (I have it at 1.5)
blending mode > linear light > opacity 60-65%
We all know how necessary this is since Instagram always distorts our beautiful photos 🥲 Here is the final image!

Hope this blog post was helpful (:
Tammy